
A Comprehensive Guide on How to Change Brightness on Samsung Curved Monitor
In today’s digital age, where our screens dominate our daily lives, mastering the control of brightness on your Samsung curved monitor is essential for optimal viewing experience. Samsung, renowned for its innovative technology, offers a range of curved monitors designed to elevate your visual experience to new heights. Whether you’re an avid gamer, a creative professional, or a casual user, knowing how to adjust brightness on your Samsung curved monitor can significantly enhance your comfort and productivity. In this comprehensive guide, Indihomespeedtest will walk you through the step-by-step process of how to change brightness on Samsung curved monitor, ensuring you make the most out of your display.
Understanding the Basics: What is Brightness?
Before delving into the intricacies of adjusting brightness on your Samsung curved monitor, let’s first understand what brightness entails. In the context of monitors, brightness refers to the intensity of the light emitted by the screen. It directly impacts the visibility of content displayed on the monitor, influencing factors such as clarity, contrast, and eye strain.
How to Change Brightness on Samsung Curved Monitor
Step 1: Accessing the Menu
Embark on the journey to perfecting your viewing experience by mastering brightness control on your Samsung curved monitor. Begin by accessing the monitor’s menu, conveniently located on the front or bottom edge. Navigate through the intuitive interface using a series of buttons or a joystick to find the brightness settings. With just a few simple clicks, you’ll be able to adjust the brightness to suit your preferences and optimize your visual comfort. Unlock the full potential of your Samsung curved monitor with ease today!
Step 2: Navigating to Brightness Settings
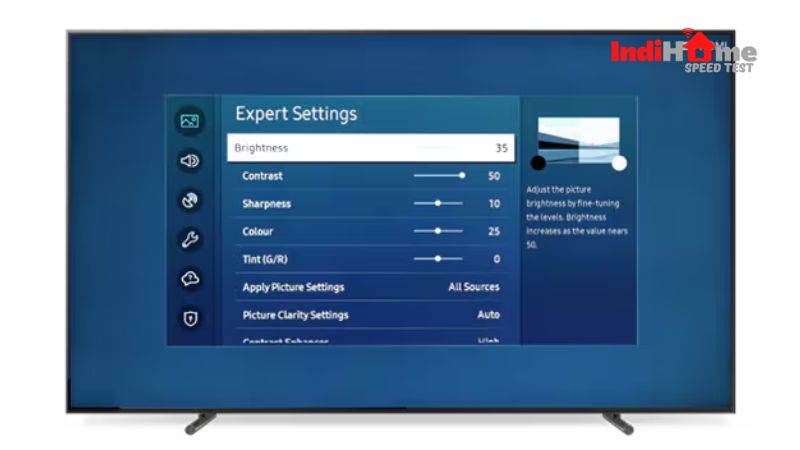
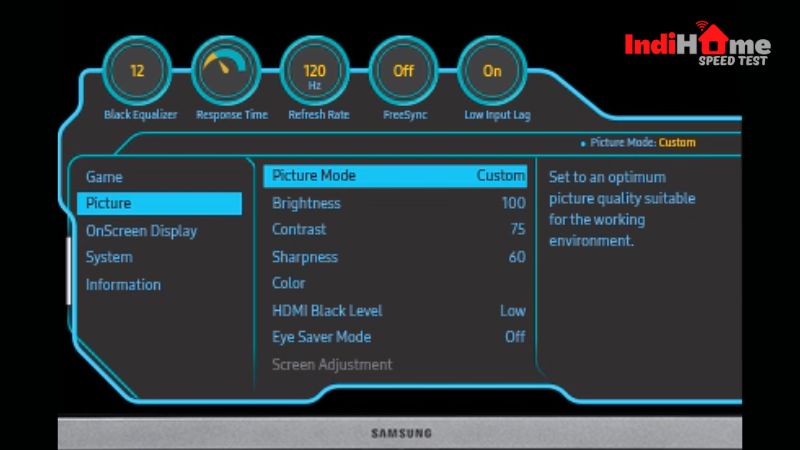
Once you’ve accessed the menu, it’s time to navigate through the options to find the brightness settings. Samsung monitors often categorize settings under intuitive labels, such as “Picture” or “Display”. Within these menus, you’ll find the brightness control option waiting to be adjusted to your preference.
Step 3: Adjusting Brightness
With the brightness control option selected, it’s time to fine-tune the brightness level according to your needs. Samsung curved monitors typically provide easy-to-use navigation buttons, allowing you to increase or decrease brightness with precision. Experiment with different brightness levels until you find the perfect balance between clarity and comfort.
Step 4: Saving Changes
After fine-tuning the brightness to your liking, it’s essential to preserve your adjustments by saving them within the menu settings. By doing so, you guarantee that your preferred brightness level remains intact each time you power on your Samsung curved monitor. This simple step enhances the consistency of your viewing experience, allowing you to enjoy optimal visual comfort effortlessly. Don’t overlook the importance of this final action—it ensures your customized settings endure for future sessions, delivering a seamless and personalized display every time you use your monitor.
Optimizing Your Viewing Experience: Additional Tips
Now that you’ve mastered the fundamental steps of adjusting brightness on your Samsung curved monitor, let’s explore some additional tips to optimize your viewing experience further.
1. Utilize Preset Modes: Many Samsung curved monitors come equipped with preset modes tailored for specific tasks, such as gaming, movie watching, or reading. Experiment with these modes to find the one that best suits your current activity, as they often adjust brightness and other display settings accordingly.
2. Consider Ambient Lighting: The lighting conditions in your environment can greatly impact the perceived brightness of your monitor. In brightly lit rooms, you may need to increase the brightness to maintain clarity, while dimmer environments may call for lower brightness levels to prevent eye strain.
3. Regular Calibration: To ensure consistent and accurate display performance, consider calibrating your Samsung curved monitor periodically. Calibration tools and software can help fine-tune brightness, contrast, and color settings, resulting in a more vibrant and true-to-life viewing experience.
4. Adjust According to Content: Different types of content may benefit from varying brightness levels. For example, text-heavy documents may require higher brightness for enhanced readability, while multimedia content like movies or photos may look best with slightly lower brightness to preserve detail and contrast.
5. Mind Your Eyes: Prolonged exposure to excessive brightness levels can lead to eye fatigue and discomfort. Be mindful of your eye health by taking regular breaks, adjusting brightness to comfortable levels, and ensuring proper ergonomics in your workstation setup.
Conclusion
To sum up, mastering brightness control on your Samsung curved monitor is a vital skill that can significantly enhance your visual comfort and productivity. By following the step-by-step guide on how to change brightness on samsung curved monitor in this article, you can confidently adjust brightness to suit your preferences and viewing conditions. Remember to explore additional optimization tips and prioritize your eye health for a truly immersive and enjoyable viewing experience.
With these insights, you’re well-equipped to harness the full potential of your Samsung curved monitor and unlock a world of vibrant, immersive visuals. So go ahead, dive into your favorite content, and experience the brilliance of a perfectly calibrated display, tailored to your unique preferences and needs. Happy viewing!